Difference between revisions of "Menus Page Manual 3.0"
(Main Block changes) |
|||
| (5 intermediate revisions by the same user not shown) | |||
| Line 115: | Line 115: | ||
! style="text-align:left;" | Owner | ! style="text-align:left;" | Owner | ||
| Operator that created this channel | | Operator that created this channel | ||
| − | | | + | | Read Only |
|- | |- | ||
|} | |} | ||
<br /> | <br /> | ||
| + | |||
| + | === UX Settings === | ||
| + | ---- | ||
| + | This block allows you to manage the UX Settings for the Channel. | ||
| + | [[File:UXSettings.png|800px|center|thumb|UX Settings]] | ||
| + | <br /> | ||
| + | {| class="wikitable" style="margin:0px;width:100%;" | ||
| + | ! style="width:15%;" | Field | ||
| + | ! style="width:45%;" | Description | ||
| + | ! style="width:40%;" | Restrictions | ||
| + | |- | ||
| + | ! style="text-align:left;border-left:5px solid red;" | Vod Default Order | ||
| + | | Default ordering for VOD contents belonging to this channel | ||
| + | | | ||
| + | * Mandatory | ||
| + | |- | ||
| + | ! style="text-align:left;border-left:5px solid red;" | Live Default Order | ||
| + | | Default ordering for LIVE contents belonging to this channel | ||
| + | | | ||
| + | * Mandatory | ||
| + | |- | ||
| + | ! style="text-align:left;border-left:5px solid red;" | Anchor Extension Position | ||
| + | | Indicates if the extensions of the VOD Channel will be placed above or bellow the VOD Channel | ||
| + | | - | ||
| + | |- | ||
| + | ! style="text-align:left;border-left:5px solid red;" | Collection Style | ||
| + | | Defines the layout applied by applications when showing this channel contents | ||
| + | | | ||
| + | * Mandatory | ||
| + | |- | ||
| + | ! style="text-align:left;border-left:5px solid red;" | Show Branding | ||
| + | | Indicates if the third party brand will be shown in the applications | ||
| + | | | ||
| + | * Mandatory | ||
| + | |- | ||
| + | ! style="text-align:left;border-left:5px solid red;" | Random Highlights Presentation | ||
| + | | Indicates if the editorial contents ordering is randomized in each catalog exportation | ||
| + | | - | ||
| + | |- | ||
| + | ! style="text-align:left;border-left:5px solid red;" | Recoms UX Reference Search | ||
| + | | Indicates the recommendation engine UX reference that will be used when showing inner contents when navigating to the VodChannels | ||
| + | | - | ||
| + | |- | ||
| + | ! style="text-align:left;border-left:5px solid red;" | Recoms UX Reference Layout | ||
| + | | Indicates the recommendation engine UX reference that will be used when navigating on the parent channel to show the highlights to the channel | ||
| + | | - | ||
| + | |- | ||
| + | ! style="text-align:left;border-left:5px solid red;" | Show Subscribed Filter | ||
| + | | Show Subscribed Filter | ||
| + | | - | ||
| + | |- | ||
| + | ! style="text-align:left;border-left:5px solid red;" | Special Channel | ||
| + | | Indicates if the channel contains editorial contents or not. Used by applications | ||
| + | | - | ||
| + | |} | ||
=== Editorial Contents === | === Editorial Contents === | ||
| Line 125: | Line 180: | ||
[[File:Editorial contents_4.1.png|800px|center|thumb|Web home page with editorial contents]] | [[File:Editorial contents_4.1.png|800px|center|thumb|Web home page with editorial contents]] | ||
<br /> | <br /> | ||
| − | [[File:EditorialContentsBlock_3.png|800px|center|thumb| | + | [[File:EditorialContentsBlock_3.png|800px|center|thumb| Editorial contents]] |
<br /> | <br /> | ||
The block displays the different Editorial Contents that have been associated to the channel and their information such as: | The block displays the different Editorial Contents that have been associated to the channel and their information such as: | ||
| − | * StartDate and EndDate (date since/until the catalog item will be available). | + | * '''Editorial Content''', which displays the Editorial Content name. |
| + | * '''StartDate''' and '''EndDate''' (date since/until the catalog item will be available). | ||
* '''Status''', which allows to review if the Editorial Content is Published or not Published, based on several properties of the Content associated to the Editorial Content: | * '''Status''', which allows to review if the Editorial Content is Published or not Published, based on several properties of the Content associated to the Editorial Content: | ||
** For '''Movies''', it displays the Movie Status, the Movie Availability Windows and Movie Device availability data | ** For '''Movies''', it displays the Movie Status, the Movie Availability Windows and Movie Device availability data | ||
| Line 136: | Line 192: | ||
[[File:EditorialContentsDetails.png|800px|center|thumb|Details of an editorial content with a movie associated]] | [[File:EditorialContentsDetails.png|800px|center|thumb|Details of an editorial content with a movie associated]] | ||
<br /> | <br /> | ||
| − | <big>'''Add an existing Editorial Content to the | + | <big>'''Add an existing Editorial Content to the Menu'''</big> |
| − | * Click the [[File: | + | * Click the [[File:AddRelatedAndSelectExisting.png|middle|130px]] button and a dialog will open to select and existing Editorial Content. If you want to create new Editorial Content, it is not possible to do it from this page, you will need to go to the [[Editorial Contents Page Manual 3.0|Editorial Contents page]]. |
| − | * | + | * It is possible to edit the Start Date and End Date. |
| − | * You can use the [[File: | + | * You can use the [[File:ColumnReorder 3.png|30px]] button to reorder the different Editorial Contents associated. |
| − | * Once finished, save changes by using the [[File:Save3.png|middle| | + | * Once finished, save changes by using the [[File:Save3.png|middle|70px]] in the Menu page and the Editorial Content will be associated.<br /> |
<br /> | <br /> | ||
| − | <big>'''Remove Editorial Content from | + | <big>'''View Details'''</big> |
| − | * Use the [[File:DeleteRed3.png|middle|30px]] button to remove the association of an editorial content from the | + | * Use the [[File:ShowPlusButton.png|middle|30px]] button to view details about the Editorial Content. |
| − | * Once finished, save changes by using the [[File:Save3.png|middle| | + | <br /> |
| + | <big>'''Remove Editorial Content from Menu'''</big> | ||
| + | * Use the [[File:DeleteRed3.png|middle|30px]] button to remove the association of an editorial content from the Menu. | ||
| + | * Once finished, save changes by using the [[File:Save3.png|middle|70px]] in the Menu page. This will not delete the Editorial Content from the platform. In order to delete it, you will have to go to the [[Editorial Contents Page Manual 3.0|Editorial Contents page]]. | ||
<br /> | <br /> | ||
| − | |||
=== Device Availability Mapping === | === Device Availability Mapping === | ||
---- | ---- | ||
| − | This blocks allows you to manage the availability of this | + | This blocks allows you to manage the availability of this Menu in the different device types in the instance it belongs to. |
| − | [[File: | + | [[File:DeviceAvailabilitiesBlock.jpg|thumb|Device availability block|center|800px]] |
<br /> | <br /> | ||
| − | + | This block has 3 different levels that can be expanded or collapsed: | |
| − | # Instance level: The first level groups all the device availabilities for an instance. It can be used to enable/disable the availabilities and configure the quality for all the device types at the same time. In a | + | # Instance level: The first level groups all the device availabilities for an instance. It can be used to enable/disable the availabilities and configure the quality for all the device types at the same time. In a Menu, it is not possible to create availabilities for different instances. It is just possible to create availabilities into the instance the Menu belongs to. The instance is calculated based on the Menu parent channel, until recursively reaches a root channel that will be linked to an Instance. |
# Device Group level: The second level groups all the device types that belong to an specific group. Device Groups are managed globally in the [[Device_Type_Groups_Page_Manual_3.0|Device Type Groups page]]. You can enable/disable the availabilities and configure the quality for all the device types of an specific group. | # Device Group level: The second level groups all the device types that belong to an specific group. Device Groups are managed globally in the [[Device_Type_Groups_Page_Manual_3.0|Device Type Groups page]]. You can enable/disable the availabilities and configure the quality for all the device types of an specific group. | ||
# Device Type level: The third level contains the specific device types, in case you want to configure the availability and/or quality of an specific device type. | # Device Type level: The third level contains the specific device types, in case you want to configure the availability and/or quality of an specific device type. | ||
| Line 161: | Line 219: | ||
'''Configuring availability'''<br /> | '''Configuring availability'''<br /> | ||
| − | The | + | The '''Enabled''' column allows you to enable/disable that specific level, affecting the containing sub-levels. It has 3 different values:<br /> |
| − | : [[File: | + | : [[File:Checkbox_Full.png|border|middle|40px]] The devices contained are enabled.<br /> |
| − | : [[File: | + | : [[File:Checkbox_Empty.png|border|middle|40px]] The devices contained are disabled.<br /> |
| − | : [[File: | + | : [[File:Checkbox_Half.png|border|middle|40px]] Mixed. Some devices contained in sub-levels might be enabled and others disabled.<br /> |
<br /> | <br /> | ||
| + | <br /> | ||
| + | |||
| + | <br /> | ||
| + | |||
| + | === Children === | ||
| + | ---- | ||
| + | This block allows adding children channels to a channel. | ||
| + | <br /> | ||
| + | [[File:ChildrenBlock.png|thumb|Children block|center|800px]] | ||
| + | <br /> | ||
| + | * This block shows the children for empty UX target | ||
| + | * Empty UX Target, means "by default". That is, relationship parent-child in an instance not using UX Targets or relationship parent-child for a user not belonging to any UX Target. | ||
| + | * Usage: | ||
| + | ** Firstly add children at this block | ||
| + | ** Secondly (future release) overwrite children set-up for a given UX target using Block UX targets Children | ||
| + | <br /> | ||
| + | <big>'''Add an existing Children to the Menu'''</big> | ||
| + | * Click the [[File:AddRelatedAndSelectExisting.png|middle|130px]] button and a dialog will open to select an existing Channel. | ||
| + | * It is possible to Enable/Disble the Children. | ||
| + | * You can use the [[File:ColumnReorder 3.png|40px]] button to reorder the different Channels associated. | ||
| + | * Once finished, save changes by using the [[File:Save3.png|middle|70px]] in the Menu page and the Child will be associated.<br /> | ||
| + | <br /> | ||
| + | <big>'''Remove Child from Menu'''</big> | ||
| + | * Use the [[File:DeleteRed3.png|middle|30px]] button to remove the association of a Child from the Menu. | ||
| + | * Once finished, save changes by using the [[File:Save3.png|middle|70px]] in the Menu page. | ||
| + | <br /> | ||
| + | |||
| + | <br /> | ||
| + | |||
| + | === UX Targets Overrides === | ||
| + | ---- | ||
| + | This block allows changing the channel title and short title for given UX Targets. | ||
| + | <br /> | ||
| + | [[File:UXTargetsOverridesBlock.png|thumb|UX Targets Overrides block|center|800px]] | ||
| + | <br /> | ||
| + | * This block shows the children for empty UX target | ||
| + | * Usage: | ||
| + | ** Firstly add UX Targets at this block | ||
| + | ** Secondly overwrite title and / or short tilte for each UX target | ||
| + | <br /> | ||
| + | <big>'''Add an existing UX Targets Overrides to the Menu'''</big> | ||
| + | * Click the [[File:AddRelatedAndSelectExisting.png|middle|130px]] button and a dialog will open to select an existing Channel. | ||
| + | * It is possible to edit the Title and Short Title of the UX Targets Overrides | ||
| + | * You can use the [[File:ColumnReorder 3.png|30px]] button to reorder the different Channels associated. | ||
| + | * Once finished, save changes by using the [[File:Save3.png|middle|70px]] in the Menu page and the UX Targets Overrides will be associated.<br /> | ||
| + | <br /> | ||
| + | <big>'''Remove UX Targets Overrides from Menu'''</big> | ||
| + | * Use the [[File:DeleteRed3.png|middle|30px]] button to remove the association of a UX Targets Overrides from the Menu. | ||
| + | * Once finished, save changes by using the [[File:Save3.png|middle|70px]] in the Menu page. | ||
| + | <br /> | ||
| + | |||
| + | <br /> | ||
| + | |||
| + | === UX Targets Children === | ||
| + | ---- | ||
| + | This block allows changing the channel’s children (their order and visibility) for each UX target. | ||
| + | <br /> | ||
| + | [[File:UXTargetsChildrenBlock.png|thumb|UX Targets Children block|center|800px]] | ||
| + | <br /> | ||
| + | * Usage: | ||
| + | ** Firstly add UX Targets at this block. | ||
| + | ** Secondly reorder and/or disable children channels for each UX target at this block too. | ||
| + | <br /> | ||
| + | <big>'''Add an existing UX Targets Children to the Menu'''</big> | ||
| + | * Click the [[File:AddRelatedAndSelectExisting.png|middle|130px]] button and a dialog will open to select existing UX Target(s). | ||
| + | * This button offers a list of UX Targets from GVP_UX_TARGETS not linked yet to this channel in table GVP_CHANNELS_CHILDREN (i.e. an entry does not exist in GVP_CHANNELS_CHILDREN with given PARENT_ID and given UX_TARGET_ID) | ||
| + | * Allows selecting several UX targets at once. | ||
| + | * It is possible to Enable/Disable the UX Targets Children. | ||
| + | * You can use the [[File:ColumnReorder 3.png|30px]] button to reorder the different UX Targets associated. | ||
| + | * Once finished, save changes by using the [[File:Save3.png|middle|70px]] in the Menu page and the UX Targets Children will be associated.<br /> | ||
| + | <big>'''Selectig the UX Target'''</big> | ||
| + | When there are more than one UX Target, it is possible to select the UX Target to view its related Channels: | ||
| + | [[File:UXTargetSelection.png|thumb|UX Targets Selection|center|433px]] | ||
| + | <br /> | ||
| + | <big>'''Remove UX Targets Children from Menu'''</big> | ||
| + | * Use the [[File:DeleteRed3.png|middle|30px]] button to remove the association of a UX Targets Children from the Menu. | ||
| + | * Once finished, save changes by using the [[File:Save3.png|middle|70px]] in the Menu page. | ||
| + | <br /> | ||
| + | |||
| + | <br /> | ||
| + | |||
| + | === Alternative Content Sources === | ||
| + | ---- | ||
| + | This block allows adding contents for external catalogs to channel. | ||
| + | It creates/updates/removes entries in GVP_ALTERNATIVE_VOD_CHANNELS table and API-HUB use info configured in this block to request contents to 3rd Party proxy. | ||
| + | <br /> | ||
| + | [[File:AlternativeContentSourcerBlock.png|center|800px|thumb|Alternative Content Sources Block]] | ||
| + | <br /> | ||
| + | <big>'''Add new Alternative Content Source'''</big> | ||
| + | * Use the [[File:AddRelatedAndAddNew.png |middle|130px]] button and the aside will open to fill the required data. | ||
| + | * The Content Source and Use Case fields are mandatory. | ||
| + | * Once finished, save changes by using the [[File:Save3.png|middle|70px]] in the Menu page.<br /> | ||
<br /> | <br /> | ||
| Line 175: | Line 325: | ||
<br /> | <br /> | ||
[[File:NowOnTVLiveChannelsBlock.png|thumb|Now On TV Live Channels block|center|800px]] | [[File:NowOnTVLiveChannelsBlock.png|thumb|Now On TV Live Channels block|center|800px]] | ||
| + | <br /> | ||
| + | <big>'''Add existing Live Channel'''</big> | ||
| + | * Click the [[File:AddRelatedAndSelectExisting.png|middle|130px]] button and a dialog will open to select an existing Live Channel. | ||
| + | * Once finished, save changes by using the [[File:Save3.png|middle|70px]] in the Menu page.<br /> | ||
<br /> | <br /> | ||
| Line 181: | Line 335: | ||
=== APPs === | === APPs === | ||
---- | ---- | ||
| − | This block allow manages the applications that are linked to the | + | This block allow manages the applications that are linked to the Menu. |
<br /> | <br /> | ||
| Line 188: | Line 342: | ||
<big>'''Add existing App'''</big> | <big>'''Add existing App'''</big> | ||
| − | * Click the [[File: | + | * Click the [[File:AddRelatedAndSelectExisting.png|middle|130px]] button and a dialog will open to select an existing App. |
| − | * Once finished, save changes by using the [[File:Save3.png|middle| | + | * Once finished, save changes by using the [[File:Save3.png|middle|70px]] in the Menu page.<br /> |
<br /> | <br /> | ||
<big>'''Delete App'''</big> | <big>'''Delete App'''</big> | ||
| − | * Use the [[File:DeleteRed3.png|middle|30px]] button to remove the relationship between App and | + | * Use the [[File:DeleteRed3.png|middle|30px]] button to remove the relationship between App and Menu. |
| − | * Once finished, save changes by using the [[File:Save3.png|middle| | + | * Once finished, save changes by using the [[File:Save3.png|middle|70px]] in the Menu page. |
<br /> | <br /> | ||
<br /> | <br /> | ||
| Line 200: | Line 354: | ||
=== Movie Criteria === | === Movie Criteria === | ||
---- | ---- | ||
| − | This blocks allows you to select those VOD Contents (Movies, Series, Seasons and Episodes) that will be available inside this channel. To do this, the operator is able to define a set of rules, called Content Criteria Filters that will be evaluated during the Catalog Exporter process. All the [[Movies_Page_Manual_3.0|Movies]] that match the specified filters will be linked to this | + | This blocks allows you to select those VOD Contents (Movies, Series, Seasons and Episodes) that will be available inside this channel. To do this, the operator is able to define a set of rules, called Content Criteria Filters that will be evaluated during the Catalog Exporter process. All the [[Movies_Page_Manual_3.0|Movies]] that match the specified filters will be linked to this Menu. |
[[File:CloneContentCriteriaGroup.jpg|thumb|Movies content criteria block|center|800px]] | [[File:CloneContentCriteriaGroup.jpg|thumb|Movies content criteria block|center|800px]] | ||
<br /> | <br /> | ||
| Line 209: | Line 363: | ||
Group2 = FilterC | Group2 = FilterC | ||
Content Criteria = (Group1 AND Group2) = ((FilterA OR FilterB) AND FilterC) | Content Criteria = (Group1 AND Group2) = ((FilterA OR FilterB) AND FilterC) | ||
| − | # First add a new '''Group''' by clicking on the [[File:NewGroupButton3.png|middle| | + | # First add a new '''Group''' by clicking on the [[File:NewGroupButton3.png|middle|130px]] button. |
| − | # Then add a new Filter by clicking on the [[File:AddMib3.png|middle| | + | # Then add a new Filter by clicking on the [[File:AddMib3.png|middle|60px]] button. |
# Select the type of filter from the list and fill the value for the filter. There are multiple filter types available and you can combine them as you want. Some examples of filters are: | # Select the type of filter from the list and fill the value for the filter. There are multiple filter types available and you can combine them as you want. Some examples of filters are: | ||
#* Commercialization Type | #* Commercialization Type | ||
| Line 226: | Line 380: | ||
# When you have added all the filters for the first group, select the operator (AND / OR) that will be used to link the filters for that group. | # When you have added all the filters for the first group, select the operator (AND / OR) that will be used to link the filters for that group. | ||
# Now you can add a new group, go back to 1. When you have finished adding groups, select the operator (AND / OR) between the different groups. | # Now you can add a new group, go back to 1. When you have finished adding groups, select the operator (AND / OR) between the different groups. | ||
| − | Once finished you can continue to the Highlights section, Orders section or Preview. Save changes at anytime by clicking on the[[File:Save3.png|middle| | + | Once finished you can continue to the Highlights section, Orders section or Preview. Save changes at anytime by clicking on the[[File:Save3.png|middle|70px]] in the Menu page. |
<br /><br /> | <br /><br /> | ||
<big>'''Highlight content'''</big><br /> | <big>'''Highlight content'''</big><br /> | ||
| − | In the new content criteria, you can select some content to be highlighted. This highlighted content will be returned first when ordering the Default order is selected in the | + | In the new content criteria, you can select some content to be highlighted. This highlighted content will be returned first when ordering the Default order is selected in the Menu. To do it, follow this steps: |
# First click on the [[File:NewGroupButton3.png|middle|80px]] button to select movies to be highlighted. | # First click on the [[File:NewGroupButton3.png|middle|80px]] button to select movies to be highlighted. | ||
# A page will open allowing you to search over the different movies you have access to. '''Important:''' You will be able to select '''ANY''' movie from the list of movies you have access to. The movie will be returned independently on the Content Criterias that you have defined in the block. Of course, if duplicated, the content will be returned only once, highlighted. | # A page will open allowing you to search over the different movies you have access to. '''Important:''' You will be able to select '''ANY''' movie from the list of movies you have access to. The movie will be returned independently on the Content Criterias that you have defined in the block. Of course, if duplicated, the content will be returned only once, highlighted. | ||
# Select one or more contents to be added. It is important to understand that the highlighted contents will be ordered depending on the order they are added. So add first the contents you want to be highlighted first. In the current version of this block, it is not available the [[https://jirapdi.tid.es/browse/GVPPLATF-40418 manual ordering of highlights]], it will be added in future versions. | # Select one or more contents to be added. It is important to understand that the highlighted contents will be ordered depending on the order they are added. So add first the contents you want to be highlighted first. In the current version of this block, it is not available the [[https://jirapdi.tid.es/browse/GVPPLATF-40418 manual ordering of highlights]], it will be added in future versions. | ||
| − | # Save changes at anytime by clicking on the[[File:Save3.png|middle| | + | # Save changes at anytime by clicking on the[[File:Save3.png|middle|70px]] in the Menu page. |
[[File:MovieCriteria_Highlights.png|thumb|Highlights selection in Content Criteria block|center|800px]] | [[File:MovieCriteria_Highlights.png|thumb|Highlights selection in Content Criteria block|center|800px]] | ||
<br /><br /> | <br /><br /> | ||
<big>'''Define default ordering and maximum number of results'''</big><br /> | <big>'''Define default ordering and maximum number of results'''</big><br /> | ||
In the new content criteria, you can also define the maximum number of results to be returned and the behavior of the '''default''' ordering and select what ordering criteria should be applied for those contents. | In the new content criteria, you can also define the maximum number of results to be returned and the behavior of the '''default''' ordering and select what ordering criteria should be applied for those contents. | ||
| − | # First click on the ''' | + | # First click on the '''Edit''' tab |
# Select the primary ordering criteria from the list available: | # Select the primary ordering criteria from the list available: | ||
#* Default: Ordered by ID | #* Default: Ordered by ID | ||
| Line 248: | Line 402: | ||
# You can also select a secondary ordering criteria, in case some movies match the primary order criteria | # You can also select a secondary ordering criteria, in case some movies match the primary order criteria | ||
# It is also possible to define a maximum number of results to be returned by the criteria. By default, it is set to 0 (unlimited). | # It is also possible to define a maximum number of results to be returned by the criteria. By default, it is set to 0 (unlimited). | ||
| − | # Save changes at anytime by clicking on the[[File:Save3.png|middle| | + | # Save changes at anytime by clicking on the[[File:Save3.png|middle|70px]] in the Menu page. |
| − | [[File: | + | [[File:MovieCriteriaDefaultOrder.png|thumb|Default Order Selection in Content Criteria block|center|800px]] |
<br /><br /> | <br /><br /> | ||
<big>'''Content Criteria Preview'''</big><br /> | <big>'''Content Criteria Preview'''</big><br /> | ||
| Line 259: | Line 413: | ||
=== LiveSchedule Criteria === | === LiveSchedule Criteria === | ||
---- | ---- | ||
| − | This block is very similar to the [[#Movie_Criteria|Movie Criteria]] block but instead of selecting movies, it can be used to select what Live Schedules will be included in this | + | This block is very similar to the [[#Movie_Criteria|Movie Criteria]] block but instead of selecting movies, it can be used to select what Live Schedules will be included in this Menu. The way of creating this content criteria is very similar. <br /> |
The only difference is the '''Content Criteria Filters''' available: | The only difference is the '''Content Criteria Filters''' available: | ||
* Genre ID | * Genre ID | ||
| Line 273: | Line 427: | ||
<br /> | <br /> | ||
| − | === | + | === External Url by Device Type === |
---- | ---- | ||
| − | + | In this block it is possible to configure an external URL, so devices can take the user to an external Menu page instead of taking them to the Menu page. | |
| − | + | The operator will be able to define a default url that will be applied to the selected device type. | |
| − | * | + | <br /> |
| − | * | + | |
| − | * | + | [[File:ExternalUrlByDeviceTypeBlock.jpg|center|900px|thumb|External Url by Device Type]] |
| − | + | ||
| − | + | <br /> | |
| − | + | <big>'''Add new External Url by Device Type'''</big> | |
| − | + | * Use the [[File:AddNew.png|middle|130px]] button and a new row will be added so you can upload the new External Url. | |
| + | * We fill the Url and the device information. | ||
| + | * Once finished, save changes by using the [[File:Save3.png|middle|70px]] in the Menu page.<br /> | ||
<br /> | <br /> | ||
| Line 292: | Line 448: | ||
'''Add new images''' | '''Add new images''' | ||
[[File:UploadImageDialog.png|thumb|Upload image dialog|right|300px]] | [[File:UploadImageDialog.png|thumb|Upload image dialog|right|300px]] | ||
| − | * Use the [[File:AddNew.png|middle| | + | * Use the [[File:AddNew.png|middle|130px]] button and a new row will be added so you can upload the new image. |
* Then click the [[File:UploadIcon.png|middle|30px]] button and a dialog will be open so you will be able to select the image to be uploaded. | * Then click the [[File:UploadIcon.png|middle|30px]] button and a dialog will be open so you will be able to select the image to be uploaded. | ||
* Now fill the rest of the image information. | * Now fill the rest of the image information. | ||
| − | *Once finished, save changes by using the [[File:Save3.png|middle| | + | *Once finished, save changes by using the [[File:Save3.png|middle|70px]] in the edit page and the image will be created and associated.<br /> |
<br /> | <br /> | ||
'''Add existing images''' | '''Add existing images''' | ||
| − | * Click the [[File:AddExisting.png|middle| | + | * Click the [[File:AddExisting.png|middle|130px]] button and a dialog will open to select and existing image. |
| − | *Once finished, save changes by using the [[File:Save3.png|middle| | + | *Once finished, save changes by using the [[File:Save3.png|middle|70px]] in the movie page and the image will be associated.<br /> |
<br clear=all> | <br clear=all> | ||
<br /> | <br /> | ||
| Line 305: | Line 461: | ||
'''Remove images''' | '''Remove images''' | ||
* Use the [[File:DeleteRed3.png|middle|30px]] button to remove the association of a image from the movie . | * Use the [[File:DeleteRed3.png|middle|30px]] button to remove the association of a image from the movie . | ||
| − | * Once finished, save changes by using the [[File:Save3.png|middle| | + | * Once finished, save changes by using the [[File:Save3.png|middle|70px]] in the movie page. This will not delete the image file from the platform. In order to delete the image, you will have to go to the [[Images_Page_Manual_3.0|Images Page]]. |
<br /> | <br /> | ||
'''Preview images'''<br /> | '''Preview images'''<br /> | ||
| Line 333: | Line 489: | ||
| − | === | + | === Anchor Extensions === |
---- | ---- | ||
| − | + | This block allows managing the corresponding Anchor Extensions to this channel.<br /> | |
| − | |||
| − | <br /> | ||
| − | [[File: | + | [[File:AnchorExtensionBlock.jpg|center|900px|thumb|Anchor Extension Block]] |
<br /> | <br /> | ||
| − | <big>'''Add new | + | <big>'''Add new Anchor Extensions'''</big> |
| − | * Use the [[File:AddNew.png|middle| | + | * Use the [[File:AddNew.png|middle|130px]] button and and aside will open to add the new Anchor Extension. |
| − | * | + | * The Name and Title fields are mandatory. |
| − | * Once finished, save changes by using the [[File:Save3.png|middle| | + | * Once finished, save changes by using the [[File:Save3.png|middle|70px]] in the Menu. |
| + | * Use the [[File:EditPencil.png|middle|70px]] button to edit the Anchor Extension. | ||
| + | <br /> | ||
<br /> | <br /> | ||
| − | === | + | === Scorings === |
---- | ---- | ||
| − | This block | + | This block allows managing the corresponding Scorings to this channel.<br /> |
| − | [[File: | + | [[File:ScoringsBlock.png|center|900px|thumb|Scorings Block]] |
<br /> | <br /> | ||
| − | <big>'''Add new | + | <big>'''Add new Scoring'''</big> |
| − | * Use the [[File:AddNew.png|middle|70px]] button and a new row will be added so you can upload the new Anchor | + | * Use the [[File:AddNew.png|middle|70px]] button and a new row will be added so you can upload the new Anchor Extension. |
| − | * | + | * The Instance field is mandatory. |
| − | + | * Once finished, save changes by using the [[File:Save3.png|middle|70px]] in the Menu. | |
| − | + | * It is possible to edit the Anchor Extension's Name, Instance, Editorial Order and BI Ranking. | |
| − | * Once finished, save changes by using the [[File:Save3.png|middle| | + | <br /> |
<br /> | <br /> | ||
| Line 378: | Line 534: | ||
| style="text-align:center" | [[File:Tick.png|16px|center]] | | style="text-align:center" | [[File:Tick.png|16px|center]] | ||
| style="text-align:center" | [[File:Tick.png|16px|center]] | | style="text-align:center" | [[File:Tick.png|16px|center]] | ||
| − | | style="text-align:center" | [[File: | + | | style="text-align:center" | [[File:Cross.png|16px|center]] |
| style="text-align:center" | [[File:Tick.png|16px|center]] | | style="text-align:center" | [[File:Tick.png|16px|center]] | ||
| style="text-align:center" | [[File:Tick.png|16px|center]] | | style="text-align:center" | [[File:Tick.png|16px|center]] | ||
| Line 385: | Line 541: | ||
|} | |} | ||
| − | === [[File:New3.png|middle| | + | === [[File:New3.png|middle|130px]] Create === |
| − | + | Menu creation is enabled by default for most of the Content operator profiles. | |
| − | # Use the [[File:New3.png|middle|30px]] button to create an empty | + | # Use the [[File:New3.png|middle|30px]] button to create an empty Menu. |
| − | # Fill all the | + | # Fill all the Menu data and the related blocks. |
| − | # Once finished, save changes by using the [[File:Save3.png|middle| | + | # Once finished, save changes by using the [[File:Save3.png|middle|70px]] button in the Menu page. |
<br /> | <br /> | ||
=== [[File:BulkEdit3.png|middle|40px]] Edit === | === [[File:BulkEdit3.png|middle|40px]] Edit === | ||
| − | + | Menu edit is enabled by default for most of the operator profiles. It can be used to perform modification in the Menu data and related information. Once finished modifying the Menu, save changes by using the [[File:Save3.png|middle|70px]] button in the Menu page. | |
<br /> | <br /> | ||
=== [[File:Edit3.png|middle|40px]] Edit in List === | === [[File:Edit3.png|middle|40px]] Edit in List === | ||
| − | Edit in list is enabled for | + | Edit in list is enabled for Menus, allowing the operator to Edit basic fields from the list view. You can modify any of the non read only fields and you can also delete any channel by clicking on the [[File:DeleteRed3.png|middle|30px]] button. Once finished, save changes by using the [[File:Save3.png|middle|70px]] button in the Menu page. |
<br /> | <br /> | ||
=== [[File:BulkEdit3.png|middle|40px]] Bulk Edit === | === [[File:BulkEdit3.png|middle|40px]] Bulk Edit === | ||
| − | Bulk Edit is | + | Bulk Edit is disabled in the Menu page. |
| − | |||
| − | |||
| − | |||
| − | |||
| − | |||
| − | |||
| − | |||
| − | |||
<br /> | <br /> | ||
=== [[File:Copy3.png|middle|40px]] Copy === | === [[File:Copy3.png|middle|40px]] Copy === | ||
| − | Copy is enabled for | + | Copy is enabled for Menus. Using the [[File:Copy3.png|middle|25px]] button, you will be able to clone the basic information from the Menu into a new Menu. The relateds will not be copied using this mode. |
| − | Once the | + | Once the Menu is copied, review that all the fields have been copied properly and press [[File:Save3.png|middle|25px]] Save button. |
<br /> | <br /> | ||
| − | === [[File:CopyWithRelateds3.png|middle| | + | === [[File:CopyWithRelateds3.png|middle|130px]] Copy with Relateds === |
| − | Copy is enabled for | + | Copy is enabled for Menus. Using the [[File:CopyWithRelateds3.png|middle|25px]] button, you will be able to clone a Menu and the relateds blocks into a new channel. <br /> |
The copy with relateds will behave differently for each block: | The copy with relateds will behave differently for each block: | ||
| + | * '''UX Settings''': Use same IDs (Shallow Copy). | ||
* '''Editorial Contents''': Use same IDs (Shallow Copy). | * '''Editorial Contents''': Use same IDs (Shallow Copy). | ||
* '''Device Availability Mapping''': Copy objects (Deep copy). | * '''Device Availability Mapping''': Copy objects (Deep copy). | ||
| + | * '''Children''': Use same IDs (Shallow Copy). | ||
| + | * '''UX Targets Overrides''': Use same IDs (Shallow Copy). | ||
| + | * '''UX Targets Children''': Use same IDs (Shallow Copy). | ||
| + | * '''Alternative Content Sources''': Use same IDs (Shallow Copy). | ||
| + | * '''Now on TV Live Channels''': Use same IDs (Shallow Copy). | ||
| + | * '''APPs''': Use same IDs (Shallow Copy). | ||
* '''Movie Criteria''': Copy objects (Deep copy). | * '''Movie Criteria''': Copy objects (Deep copy). | ||
* '''LiveSchedule Criteria''': Copy objects (Deep copy). | * '''LiveSchedule Criteria''': Copy objects (Deep copy). | ||
| − | * ''' | + | * '''External Url by Device Type''': Use same IDs (Shallow Copy). |
* '''Images''': Use same IDs (Shallow Copy). | * '''Images''': Use same IDs (Shallow Copy). | ||
| + | * '''Anchor Extensions''': Use same IDs (Shallow Copy). | ||
| + | * '''Collection Layout''': Use same IDs (Shallow Copy). | ||
| + | * '''Collection Assets''': Use same IDs (Shallow Copy). | ||
| + | * '''Scorings''': Use same IDs (Shallow Copy). | ||
| − | Once the | + | Once the Menu is copied, review that all the fields have been copied properly and press [[File:Save3.png|middle|70px]] Save button. |
<br /> | <br /> | ||
| − | === [[File: | + | === [[File:IconHistoryDashboard.jpg|middle|40px]] Edit History === |
Edit History is enabled. This slide shows the history of the modifications made on this page. By default, the results of the main entity are displayed. But there is also a dropdown where the user can display the changes applied to a particular related entity. | Edit History is enabled. This slide shows the history of the modifications made on this page. By default, the results of the main entity are displayed. But there is also a dropdown where the user can display the changes applied to a particular related entity. | ||
| Line 440: | Line 599: | ||
=== [[File:Delete3.png|middle|40px]] Delete === | === [[File:Delete3.png|middle|40px]] Delete === | ||
| − | You can delete a | + | You can delete a Menu either from the Edit in List or from theMenu page, using the [[File:Delete3.png|middle|30px]] button. A confirmation popup will be shown before excluding it. |
<br /> | <br /> | ||
Latest revision as of 11:46, 30 December 2025
Access to this menu in Betools through: ![]() Customer Experience > Menus
Customer Experience > Menus
Contents
- 1 Blocks
- 1.1 VOD Channels
- 1.2 UX Settings
- 1.3 Editorial Contents
- 1.4 Device Availability Mapping
- 1.5 Children
- 1.6 UX Targets Overrides
- 1.7 UX Targets Children
- 1.8 Alternative Content Sources
- 1.9 Now on TV Live Channels
- 1.10 APPs
- 1.11 Movie Criteria
- 1.12 LiveSchedule Criteria
- 1.13 External Url by Device Type
- 1.14 Images
- 1.15 Collection Layout
- 1.16 Collection Assets
- 1.17 Anchor Extensions
- 1.18 Scorings
- 2 Actions
This page shows contents in CHANNELS table with CatalogType: 10 (Menu).
Blocks
VOD Channels

| Field | Description | Restrictions |
|---|---|---|
| Name | Name for this Channel. Not displayed in applications, it is used for internal use only. |
|
| Title | Title for the channel that is show in the different applications | - |
| Title in Small Screens | Shown in Strips of devices with small screens. Can be overwritten at parent page | - |
| Title in Menu | Title in menu for the channel. | - |
| Tooltip | Tooltip shown when this CHA is shown in the Menu of a Big Screen | - |
| Description | Contains some text describing the channel. Currently this field is not used in applications | - |
| Parent Channel | Parent channel in the VOD channel tree | - |
| Order | Order of this channel inside the parent channel | - |
| Available From | Allows to configure the start date when this channel will be displayed in applications. |
|
| Available Until | Allows to configure the end date when this channel will be displayed in applications |
|
| Enabled | Allows to enable or disable this channel. When modified, requieres a catalog exportation to be completed. |
|
| Requires Pin | Indicates if the channel contains Adult content or not. Will be used by applications to request the user for the parental/adult pin to access to its contents. |
|
| Catalog Type | Allows to configure the type of channel and the type contents that are included in it |
|
| Menu Type | Allows to configure the type of menu for Channels of Catalog Type 10 (Menu) | - |
| Deeplink Type | Allows to configure the type of menu for Channels of Catalog Type 11 (Deeplink) | - |
| Settings ID | Allows to select a Setting for the Channel | - |
| Opens in new window | Allows to select if the Channel opens in a new window or not | - |
| Show All | ID of CHA that will be open when user clicks "Show All" Button in the User Interface | - |
| Minimum Contents To Be Displayed | When there are less contents, the row is not shown in the device | - |
| Minimum Contents To Display Show All Button | Minimum Contents To Display Show All Button | - |
| Source | Controls the access and visibility of this channel for other operators. Only operators with rights over this source or its children will be able to see it. |
|
| Owner | Operator that created this channel | Read Only |
UX Settings
This block allows you to manage the UX Settings for the Channel.

| Field | Description | Restrictions |
|---|---|---|
| Vod Default Order | Default ordering for VOD contents belonging to this channel |
|
| Live Default Order | Default ordering for LIVE contents belonging to this channel |
|
| Anchor Extension Position | Indicates if the extensions of the VOD Channel will be placed above or bellow the VOD Channel | - |
| Collection Style | Defines the layout applied by applications when showing this channel contents |
|
| Show Branding | Indicates if the third party brand will be shown in the applications |
|
| Random Highlights Presentation | Indicates if the editorial contents ordering is randomized in each catalog exportation | - |
| Recoms UX Reference Search | Indicates the recommendation engine UX reference that will be used when showing inner contents when navigating to the VodChannels | - |
| Recoms UX Reference Layout | Indicates the recommendation engine UX reference that will be used when navigating on the parent channel to show the highlights to the channel | - |
| Show Subscribed Filter | Show Subscribed Filter | - |
| Special Channel | Indicates if the channel contains editorial contents or not. Used by applications | - |
Editorial Contents
This block allows you to manage the Editorial Contents associated to a channel and order them so you highlight some contents in it.


The block displays the different Editorial Contents that have been associated to the channel and their information such as:
- Editorial Content, which displays the Editorial Content name.
- StartDate and EndDate (date since/until the catalog item will be available).
- Status, which allows to review if the Editorial Content is Published or not Published, based on several properties of the Content associated to the Editorial Content:
- For Movies, it displays the Movie Status, the Movie Availability Windows and Movie Device availability data
- For Subscriptions, it displays the Subscription Start Date and End Date
- For Live TV Channels, it displays the Live Channel Instance, Device Type, Enable Playback and Quality data.

Add an existing Editorial Content to the Menu
- Click the
 button and a dialog will open to select and existing Editorial Content. If you want to create new Editorial Content, it is not possible to do it from this page, you will need to go to the Editorial Contents page.
 - It is possible to edit the Start Date and End Date.
- You can use the
 button to reorder the different Editorial Contents associated.
 - Once finished, save changes by using the
 in the Menu page and the Editorial Content will be associated.

View Details
- Use the
 button to view details about the Editorial Content.
Remove Editorial Content from Menu
- Use the
 button to remove the association of an editorial content from the Menu.
 - Once finished, save changes by using the in the Menu page. This will not delete the Editorial Content from the platform. In order to delete it, you will have to go to the Editorial Contents page.
Device Availability Mapping
This blocks allows you to manage the availability of this Menu in the different device types in the instance it belongs to.

This block has 3 different levels that can be expanded or collapsed:
- Instance level: The first level groups all the device availabilities for an instance. It can be used to enable/disable the availabilities and configure the quality for all the device types at the same time. In a Menu, it is not possible to create availabilities for different instances. It is just possible to create availabilities into the instance the Menu belongs to. The instance is calculated based on the Menu parent channel, until recursively reaches a root channel that will be linked to an Instance.
- Device Group level: The second level groups all the device types that belong to an specific group. Device Groups are managed globally in the Device Type Groups page. You can enable/disable the availabilities and configure the quality for all the device types of an specific group.
- Device Type level: The third level contains the specific device types, in case you want to configure the availability and/or quality of an specific device type.
Configuring availability
The Enabled column allows you to enable/disable that specific level, affecting the containing sub-levels. It has 3 different values:
 The devices contained are enabled.
 The devices contained are disabled.
 Mixed. Some devices contained in sub-levels might be enabled and others disabled.
Children
This block allows adding children channels to a channel.

- This block shows the children for empty UX target
- Empty UX Target, means "by default". That is, relationship parent-child in an instance not using UX Targets or relationship parent-child for a user not belonging to any UX Target.
- Usage:
- Firstly add children at this block
- Secondly (future release) overwrite children set-up for a given UX target using Block UX targets Children
Add an existing Children to the Menu
- Click the button and a dialog will open to select an existing Channel.
- It is possible to Enable/Disble the Children.
- You can use the button to reorder the different Channels associated.
- Once finished, save changes by using the in the Menu page and the Child will be associated.
Remove Child from Menu
- Use the button to remove the association of a Child from the Menu.
- Once finished, save changes by using the in the Menu page.
UX Targets Overrides
This block allows changing the channel title and short title for given UX Targets.

- This block shows the children for empty UX target
- Usage:
- Firstly add UX Targets at this block
- Secondly overwrite title and / or short tilte for each UX target
Add an existing UX Targets Overrides to the Menu
- Click the button and a dialog will open to select an existing Channel.
- It is possible to edit the Title and Short Title of the UX Targets Overrides
- You can use the button to reorder the different Channels associated.
- Once finished, save changes by using the in the Menu page and the UX Targets Overrides will be associated.
Remove UX Targets Overrides from Menu
- Use the button to remove the association of a UX Targets Overrides from the Menu.
- Once finished, save changes by using the in the Menu page.
UX Targets Children
This block allows changing the channel’s children (their order and visibility) for each UX target.

- Usage:
- Firstly add UX Targets at this block.
- Secondly reorder and/or disable children channels for each UX target at this block too.
Add an existing UX Targets Children to the Menu
- Click the button and a dialog will open to select existing UX Target(s).
- This button offers a list of UX Targets from GVP_UX_TARGETS not linked yet to this channel in table GVP_CHANNELS_CHILDREN (i.e. an entry does not exist in GVP_CHANNELS_CHILDREN with given PARENT_ID and given UX_TARGET_ID)
- Allows selecting several UX targets at once.
- It is possible to Enable/Disable the UX Targets Children.
- You can use the button to reorder the different UX Targets associated.
- Once finished, save changes by using the in the Menu page and the UX Targets Children will be associated.
Selectig the UX Target When there are more than one UX Target, it is possible to select the UX Target to view its related Channels:

Remove UX Targets Children from Menu
- Use the button to remove the association of a UX Targets Children from the Menu.
- Once finished, save changes by using the in the Menu page.
Alternative Content Sources
This block allows adding contents for external catalogs to channel.
It creates/updates/removes entries in GVP_ALTERNATIVE_VOD_CHANNELS table and API-HUB use info configured in this block to request contents to 3rd Party proxy.

Add new Alternative Content Source
- Use the
 button and the aside will open to fill the required data.
 - The Content Source and Use Case fields are mandatory.
- Once finished, save changes by using the in the Menu page.

Now on TV Live Channels
This block allows managing the associated live channels.

Add existing Live Channel
- Click the button and a dialog will open to select an existing Live Channel.
- Once finished, save changes by using the in the Menu page.
APPs
This block allow manages the applications that are linked to the Menu.

Add existing App
- Click the button and a dialog will open to select an existing App.
- Once finished, save changes by using the in the Menu page.
Delete App
- Use the button to remove the relationship between App and Menu.
- Once finished, save changes by using the in the Menu page.
Movie Criteria
This blocks allows you to select those VOD Contents (Movies, Series, Seasons and Episodes) that will be available inside this channel. To do this, the operator is able to define a set of rules, called Content Criteria Filters that will be evaluated during the Catalog Exporter process. All the Movies that match the specified filters will be linked to this Menu.

Create new Content Criteria
It is really easy to create a new content criteria. You only have to build an expression by combining filters that will be evaluated to select the movies that match. The expression will be composed of one or more Groups each of them composed of one or more filters and the AND/OR relationship between them. We can clone a group with the ![]() button.
Example:
button.
Example:
Group1 = FilterA OR FilterB
Group2 = FilterC
Content Criteria = (Group1 AND Group2) = ((FilterA OR FilterB) AND FilterC)
- First add a new Group by clicking on the
 button.
 - Then add a new Filter by clicking on the
 button.
 - Select the type of filter from the list and fill the value for the filter. There are multiple filter types available and you can combine them as you want. Some examples of filters are:
- Commercialization Type
- Content Category
- Distributor ID
- Episodes by SeasonID
- Episodes by SearieID
- Genre ID
- Instance ID
- Last X days
- Movie Type
- Person Role
- etc.
- Continue adding as many filters as desired to build the first group expression.
- When you have added all the filters for the first group, select the operator (AND / OR) that will be used to link the filters for that group.
- Now you can add a new group, go back to 1. When you have finished adding groups, select the operator (AND / OR) between the different groups.

Once finished you can continue to the Highlights section, Orders section or Preview. Save changes at anytime by clicking on the![]() in the Menu page.
in the Menu page.
Highlight content
In the new content criteria, you can select some content to be highlighted. This highlighted content will be returned first when ordering the Default order is selected in the Menu. To do it, follow this steps:
- First click on the
 button to select movies to be highlighted.
 - A page will open allowing you to search over the different movies you have access to. Important: You will be able to select ANY movie from the list of movies you have access to. The movie will be returned independently on the Content Criterias that you have defined in the block. Of course, if duplicated, the content will be returned only once, highlighted.
- Select one or more contents to be added. It is important to understand that the highlighted contents will be ordered depending on the order they are added. So add first the contents you want to be highlighted first. In the current version of this block, it is not available the [manual ordering of highlights], it will be added in future versions.
- Save changes at anytime by clicking on the in the Menu page.

Define default ordering and maximum number of results
In the new content criteria, you can also define the maximum number of results to be returned and the behavior of the default ordering and select what ordering criteria should be applied for those contents.
- First click on the Edit tab
- Select the primary ordering criteria from the list available:
- Default: Ordered by ID
- Editorial Rating : Ordered by movie Editorial Rating value
- Episode / Season Order: Ordered by movie.order value
- Most Rated: Ordered by rating value
- Popularity: Ordered by views value
- Release Date: Ordered by movie release date value.
- You can also select a secondary ordering criteria, in case some movies match the primary order criteria
- It is also possible to define a maximum number of results to be returned by the criteria. By default, it is set to 0 (unlimited).
- Save changes at anytime by clicking on the in the Menu page.

Content Criteria Preview
At any time you can go to the Preview tab and evaluate the results of the Content Criteria.

LiveSchedule Criteria
This block is very similar to the Movie Criteria block but instead of selecting movies, it can be used to select what Live Schedules will be included in this Menu. The way of creating this content criteria is very similar.
The only difference is the Content Criteria Filters available:
- Genre ID
- Instance ID
- Live Channel ID
- Program Type
- Schedule Starts now until X days
And the Content Criteria Orders available:
- Default: Ordered by ID
- Editorial Rating : Ordered by Live Schedule Editorial Rating value
- License Availability End: Ordered by Live Schedule end value.
External Url by Device Type
In this block it is possible to configure an external URL, so devices can take the user to an external Menu page instead of taking them to the Menu page.
The operator will be able to define a default url that will be applied to the selected device type.

Add new External Url by Device Type
- Use the
 button and a new row will be added so you can upload the new External Url.
 - We fill the Url and the device information.
- Once finished, save changes by using the in the Menu page.
Images
This block allows you to manage the images associated to the movie and the information associated, such as the Type and Quality.

Add new images

- Use the button and a new row will be added so you can upload the new image.
- Then click the
 button and a dialog will be open so you will be able to select the image to be uploaded.
 - Now fill the rest of the image information.
- Once finished, save changes by using the in the edit page and the image will be created and associated.
Add existing images
- Click the
 button and a dialog will open to select and existing image.
 - Once finished, save changes by using the in the movie page and the image will be associated.

Remove images
- Use the button to remove the association of a image from the movie .
- Once finished, save changes by using the in the movie page. This will not delete the image file from the platform. In order to delete the image, you will have to go to the Images Page.
Preview images
By clicking in the ![]() button in each image, you can access to the image preview.
button in each image, you can access to the image preview.
Collection Layout
This block allows you to configure the height, width, shape and construction of visual elements and metadata. The configuration is at the VoD Channel "collection of collections" level.

Collection Assets
This block allows you to configure the types of images to use. The configuration is done at the VoD Channel "collection of collections" level.

Anchor Extensions
This block allows managing the corresponding Anchor Extensions to this channel.

Add new Anchor Extensions
- Use the button and and aside will open to add the new Anchor Extension.
- The Name and Title fields are mandatory.
- Once finished, save changes by using the in the Menu.
- Use the
 button to edit the Anchor Extension.

Scorings
This block allows managing the corresponding Scorings to this channel.

Add new Scoring
- Use the
 button and a new row will be added so you can upload the new Anchor Extension.
 - The Instance field is mandatory.
- Once finished, save changes by using the in the Menu.
- It is possible to edit the Anchor Extension's Name, Instance, Editorial Order and BI Ranking.
Actions
| Create | Edit | Edit in List | Bulk Edit | Copy | Copy with Relateds | Edit History | Delete |
|---|---|---|---|---|---|---|---|
 Create

Menu creation is enabled by default for most of the Content operator profiles.
- Use the
 button to create an empty Menu.
 - Fill all the Menu data and the related blocks.
- Once finished, save changes by using the button in the Menu page.
 Edit
Edit
Menu edit is enabled by default for most of the operator profiles. It can be used to perform modification in the Menu data and related information. Once finished modifying the Menu, save changes by using the ![]() button in the Menu page.
button in the Menu page.
 Edit in List
Edit in list is enabled for Menus, allowing the operator to Edit basic fields from the list view. You can modify any of the non read only fields and you can also delete any channel by clicking on the ![]() button. Once finished, save changes by using the
button. Once finished, save changes by using the ![]() button in the Menu page.
button in the Menu page.
Bulk Edit
Bulk Edit is disabled in the Menu page.
 Copy
Copy
Copy is enabled for Menus. Using the ![]() button, you will be able to clone the basic information from the Menu into a new Menu. The relateds will not be copied using this mode.
Once the Menu is copied, review that all the fields have been copied properly and press
button, you will be able to clone the basic information from the Menu into a new Menu. The relateds will not be copied using this mode.
Once the Menu is copied, review that all the fields have been copied properly and press ![]() Save button.
Save button.
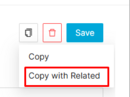 Copy with Relateds

Copy is enabled for Menus. Using the ![]() button, you will be able to clone a Menu and the relateds blocks into a new channel.
button, you will be able to clone a Menu and the relateds blocks into a new channel.
The copy with relateds will behave differently for each block:
- UX Settings: Use same IDs (Shallow Copy).
- Editorial Contents: Use same IDs (Shallow Copy).
- Device Availability Mapping: Copy objects (Deep copy).
- Children: Use same IDs (Shallow Copy).
- UX Targets Overrides: Use same IDs (Shallow Copy).
- UX Targets Children: Use same IDs (Shallow Copy).
- Alternative Content Sources: Use same IDs (Shallow Copy).
- Now on TV Live Channels: Use same IDs (Shallow Copy).
- APPs: Use same IDs (Shallow Copy).
- Movie Criteria: Copy objects (Deep copy).
- LiveSchedule Criteria: Copy objects (Deep copy).
- External Url by Device Type: Use same IDs (Shallow Copy).
- Images: Use same IDs (Shallow Copy).
- Anchor Extensions: Use same IDs (Shallow Copy).
- Collection Layout: Use same IDs (Shallow Copy).
- Collection Assets: Use same IDs (Shallow Copy).
- Scorings: Use same IDs (Shallow Copy).
Once the Menu is copied, review that all the fields have been copied properly and press ![]() Save button.
Save button.
 Edit History
Edit History is enabled. This slide shows the history of the modifications made on this page. By default, the results of the main entity are displayed. But there is also a dropdown where the user can display the changes applied to a particular related entity.
 Delete
You can delete a Menu either from the Edit in List or from theMenu page, using the ![]() button. A confirmation popup will be shown before excluding it.
button. A confirmation popup will be shown before excluding it.