MIB 3.0 Manual page
Contents
- 1 Introduction to MIB 3.0
- 2 MIB 3.0 commons
- 3 MIB 3.0 pages
- 3.1 Instances
- 3.1.1 Notifications
- 3.1.2 Settings
- 3.1.3 Massive Commands
- 3.2 Users
- 3.3 Video On Demand
- 3.4 Sports
- 3.5 Live
- 3.6 Commercial
- 3.7 Commons
- 3.8 Administration
- 3.9 DTH Manager
- 3.1 Instances
Introduction to MIB 3.0
MIB is the main management tool in TV Open Platform. It allows the operator to manage the entire platform: configurations, parameters, users, commercial offer, contents and much more. In this new version, the tool has been completely redesigned in terms of user experience, adding a new design based on Google's material design and new features such as Edit in Lists, Bulk Edit, and more.
What's new in this version?
- Renewed UI
- Favorite search filters
- Search history
- Bulk Edit
- Clone items
- Edit in lists
- Lists columns management
- Favorite and History menu navigation
MIB 3.0 commons
User Login page
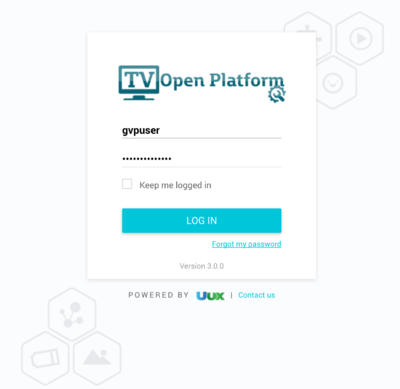
This page that allows you to authenticate in MIB with your credentials before entering in the system.
You will be requested to type the username and password fields; If the login and password match, the login will be successful and you will be logged and go to your MIB home page. The login request are sent in a secure way, through POST and HTTPs, hiding the user login and password from a third party.
There is also a Keep me logged in checkbox to allow the browser to remember the token and allow you to maintain logged for longer time, until the session expires or you perform logout.
Wrong user/password
When you type a wrong username and/or password, MIB will show an an error alert with a message specifying the source of the error. You will be able to try again in case you made a mistake.
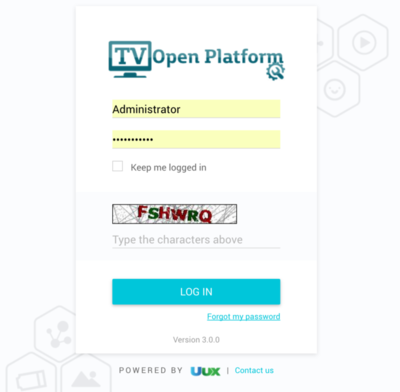
Captcha validation
A Captcha will be shown after several unsuccessful login attempts (up to 5). Then you will have then to fill the captcha field with the correct code or the login will continue failing even if the password is correct. This is done to avoid computer brute force attacks.
Password expiration
Some users might have configured password expiration (see MIB User Management) during user provisioning. In that case, you will be requested to change their password every 60 days.
When your password has expired, you will be prompted upon a correct login request with a dialog to type the new password. Then you will have to provide the old password and the new password twice. If the new passwords mismatch or the old password is wrong, MIB will show an error.
Also, the new password will have to follow a determined regex patter (which is defined in a configuration file). Currently, the password must be at least 8 chars long and must contain at least one capital letter, one number and one special character.
Forgot my password
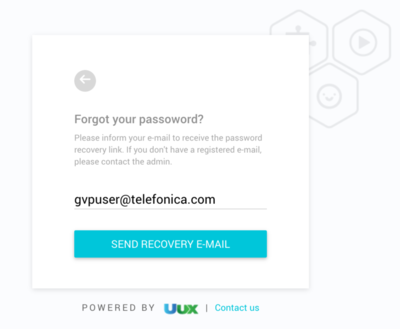
In case you have forgotten your password, there is a password retrieval option in the login page, that will allow you to request a recovery email containing a secure link to generate a new password for you.
To do this, you will have to type in the same email that is associated to your account and press Send recovery email button. Then a new [File:PasswordRecoveryEmailSent.png|menu] will be shown asking you to type the same email that was associated to his account and a password retrieval email will be sent.
In the password retrieval email, you will get a link that will take him to a password recovery page where will be able to type in a new password. Once the password has been typed correctly (twice), your password will be changed to this new password provided.
User Profile page
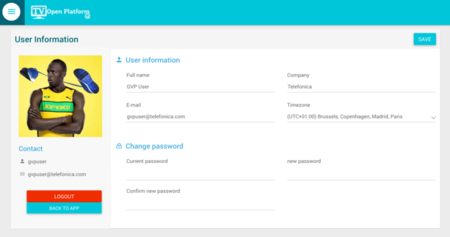
This page allows you to manage the information and settings associated to your account, update your profile picture or change your password.
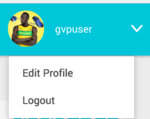
To access this page, go to the top-right corner of the page; under the profile picture there is a drop down menu and then select the Edit Profile option.
In this page, you will be able to perform several actions. Once done, press ![]() button to apply your changes.
button to apply your changes.
Update profile picture
Allows you to provide an updated profile picture. Hover on the current picture to select a new one.
Update user information
Allows you to update your Full Name, Email (required for password retrieval), Company and Timezone.
Change password
Allows you to change your password. For this, you will have to provide your current password and the new password twice.
![]() Allows you to logout from MIB3.
Allows you to logout from MIB3.
![]() Allows you to go back to MIB3.
Allows you to go back to MIB3.
Main Menu
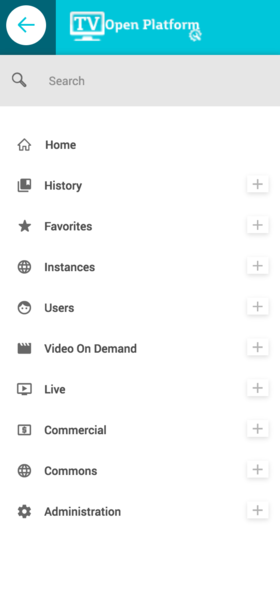
The main menu is a collapsable menu that can be accessed by clicking in the top left corner of the page ![]()
The menu can be hidden by clicking again in the top left corner of the page ![]()
Once open, it shows the different menu items. You can navigate over the different menu items and expand 25px or collapse 25px them to access sub-menus that are contained in the main categories. You will only be able to access to those menus where you have permissions
The complete list of menu items can be found in the MIB 3.0 pages section.
![]() Search Menu Bar
Search Menu Bar
It allows you to search for specific menu items without having to navigate to them. Just type in the bot the menu name and the different menus that match your search will be returned.
![]() Home
Home
The Home menu allows you to easily go to your MIB home page. For now, this page will be a pre-configure page associated to your profile, but in the future will be replaced by a custom home page with some useful information and statistics.
![]() Navigation History
Navigation History
The History menu item allows you to browser over the last five menus that you have recently visited. To navigate back to any of them, just click on them and you will be redirected.
![]() Favorite Menus
Favorite Menus
The Favorite Menus item allows you to browser over your favorite menus. The user is able to favorite and unfavorite menus by clicking in the favorite star next to the menu title in the Navigation Bar.

List Pages
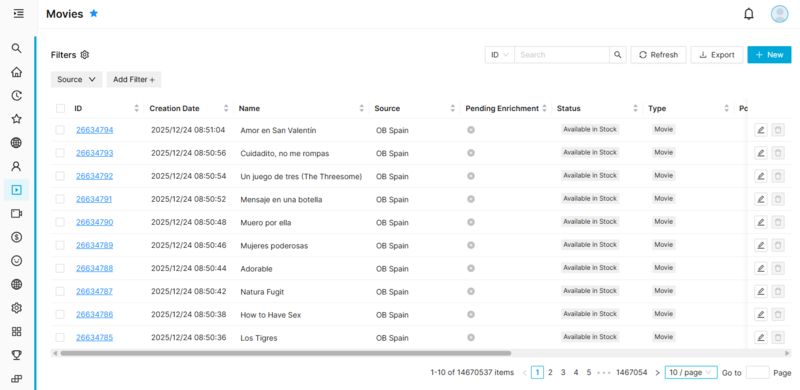
When you access to a menu, you will first arrive to the List Page, where you will be able to browse over the menu items you have access to (for example, the list of movies). The access to the different items on the list is controlled through the Source field. You will only be able to access those items that belong to the Sources where you have access.
In this menu, you are able to do several actions which are described in the following sections.
Paging
The items displayed in list are divided in pages. At the bottom of the screen you have different information that allows you to navigate over the different pages:
First you can check the total number of items that this page has and the current page you are in.
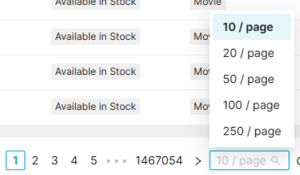
Also, you are able to select the number of results that will be returned per page, allowing you to select between 10 and 200 results per page.
You can also jump to a specific page number. Just type in the page number and click in the GO button.
You can also move between the different pages using the page navigation bar, where will be highlighted the current page number you are in:
- Click on the < button to go to the previous page
- Click on the > button to go to the next page
- Click on any of the Page numbers to jump directly to that specific page.
 Edit columns & reordering
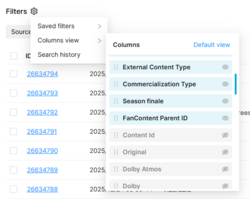
The ![]() button allows you to select which columns will be displayed and their ordering. You can select up to any number of columns, but the minimum is two. If the number of columns exceeds the width of the page, an horizontal scroll will be added that will allow you to navigate to all the columns of the list
button allows you to select which columns will be displayed and their ordering. You can select up to any number of columns, but the minimum is two. If the number of columns exceeds the width of the page, an horizontal scroll will be added that will allow you to navigate to all the columns of the list
 Unckeched: The column will not be displayed
  Checked: The column will be displayed
  Locked: The column is always displayed, cannot be hidden.
  Use this to drag and drop the different columns and define a custom ordering of the columns you want to be displayed.
Once finished, use the ![]() button to save your selection. Setting are saved in your user profile, so the next time you enter in the page, you will have your preferred ordering.
button to save your selection. Setting are saved in your user profile, so the next time you enter in the page, you will have your preferred ordering.
If you want to select back the default columns, click on the Reset to Default button.
 Simple Search
The Simple Search allows you to search elements that match one of the columns of the menu. It only allows to search over the columns that are currently displayed.
In order to perform a search:
- First select the field/column you want to search in
- Second select the operator. The operators available will vary depending on the data type of the column you are searching in.
- Numeric and date fields have: Equal, Not Equal, Greater Than, Greater or Equal than, Less Than, Less or Equal than.
- Text fields have: Like, Equal, Not Equal, Starts with, Ends with.
- Introduce the search term and click
 button or press Enter.
To remove the search filter, click on Clear Search ![]() button.
button.
 Advanced Search
The Advanced Search menu can be accessed clicking the ![]() button. It allows you to create advanced search filters by several search terms over any of the columns available in the menu.
button. It allows you to create advanced search filters by several search terms over any of the columns available in the menu.
To create an Advanced Search filter:
- Click on the
 button to add a new search query.
 - First select the Media Type (data table) where you are going to search in. In this version, only the current table can be searched in.
- Second select the Field/Column you want to search in.
- Then select the Condition/Operator. The operators available will vary depending on the data type of the column you are searching in.
- Numeric and date fields have: Equal, Not Equal, Greater Than, Greater or Equal than, Less Than, Less or Equal than.
- Text fields have: Like, Equal, Not Equal, Starts with, Ends with.
- Now introduce the search term.
You can add as many search queries as you want. You can also remove any of them by clicking on the ![]() button.
button.
Once finished, you can select if you want to search in All (AND) or Any (OR). Then click in the Run Advanced Search button to execute the search.
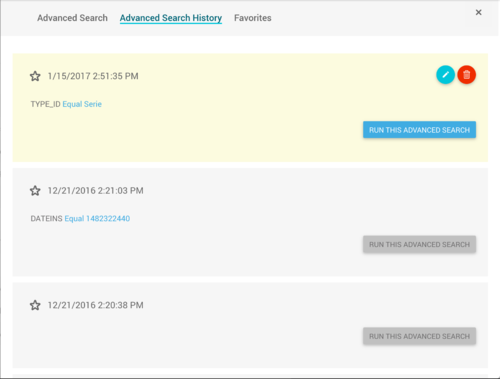
A new feature in MIB 3 is that you can access to your search filters history for the page and run any of the already execute search filters, favorite a search filter and remove them.
Run past search filter
- 1. Navigate over the different search filters in your history.
- 2. Select the filter and press Run This Advanced Search button. The search will be executed.
Favorite search filter
Edit search filter
Delete search filter
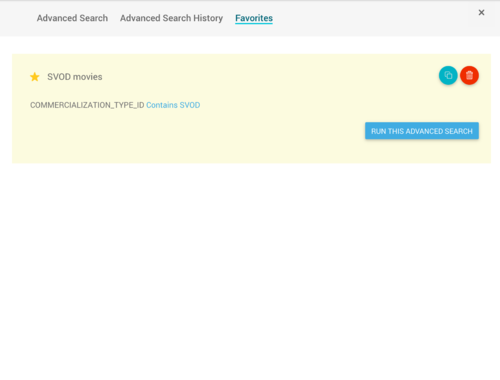
You can manage your favorites from the Advanced Search Favorites menu. Here you can review your favorite filters for the current page and edit your favorites list.
Run Favorite Search
- Navigate over the different favorite search filters.
- Select the filter and press Run This Advanced Search button. The search will be executed.
Remove from favorites
- Navigate over the different favorite search filters.
- Press the
 button and the filter will be removed from your favorites list.
Modify favorite filter
- Navigate over the different favorite search filters.
- Press the 25px button and the search filter will be open and you will be able to modify it, run it or update it.
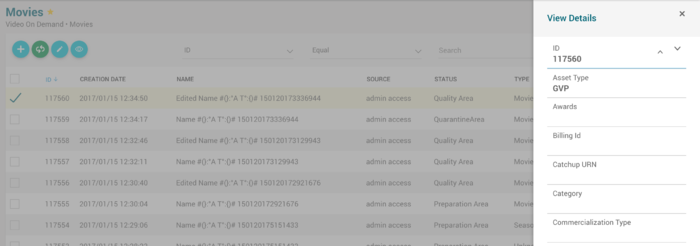
 Item details Preview
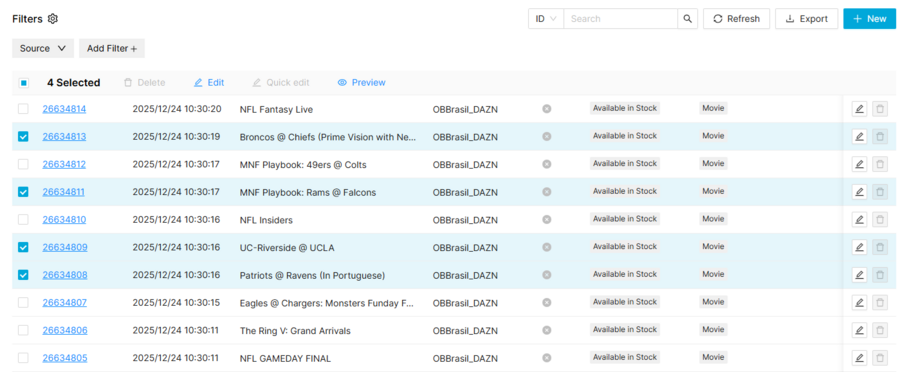
To access the preview for an item from the List view, first you will have to select a row item by clicking in the checkbox ![]()
Then click on the preview button ![]() to access the item details.
to access the item details.
 Export to TSV
The ![]() button allows to export the data being displayed in the list to a TSV file. You can select between two options:
button allows to export the data being displayed in the list to a TSV file. You can select between two options:
- Export current page: will generate a TSV file with the current page results.
- Export all pages: will generate a TSV file with all the pages.
Once selected, the TSV file will start generating in background.
MIB will notify you when the files have been generated through a notification ![]() .
.
Click on the notification to download the TSV file. To clear the notification, please click on the double check button 30px.
 Edit in list
One of the new features in MIB 3.0 version is the possibility of performing edition of data in lists, without having to go to the edit page. Only some of the pages have Edit in list feature enabled. Please visit the different MIB 3.0 pages to review which pages have this feature enabled. You can also know Edit in List is enabled because you will be able to find a ![]() button in the right top of the list page.
button in the right top of the list page.
To edit an item in a list, hover on any of the fields that you want to edit. An edit icon ![]() will appear indicating that the you can edit the field. Otherwise, a forbidden icon will appear, indicating that that you cannot edit that field.
will appear indicating that the you can edit the field. Otherwise, a forbidden icon will appear, indicating that that you cannot edit that field.
Click on the edit icon ![]() and you will be able to edit the field. When finished, press Enter or click outside the edit area.
and you will be able to edit the field. When finished, press Enter or click outside the edit area.
The field will be highlighted, indicating that the field has been modified. Continue editing more entries.
Once finished editing, press ![]() button and changes will be applied.
button and changes will be applied.
 Add New item
By clicking on the ![]() button, you can create a new item. You will be taken to the Edit page to create a new item.
button, you can create a new item. You will be taken to the Edit page to create a new item.
 Edit
Edit
By clicking on the ![]() button, you can create a new item. You will be taken to the Edit page to modify an existing new item.
button, you can create a new item. You will be taken to the Edit page to modify an existing new item.
 Bulk Edit
You can also edit several items at the same time, it is called Bulk Edit. To do it, select more than one row and click on the ![]() button. You will be taken to the Bulk Edit page to edit all the selected items at the same time.
button. You will be taken to the Bulk Edit page to edit all the selected items at the same time.
 Delete item
You can also delete any row items by clicking on the ![]() . Once finished, click on the
. Once finished, click on the ![]() button and the items will be deleted.
button and the items will be deleted.
 Refresh list
In case you want to refresh the page results, click on the ![]() button and the page will be loaded again.
button and the page will be loaded again.
Edit Page
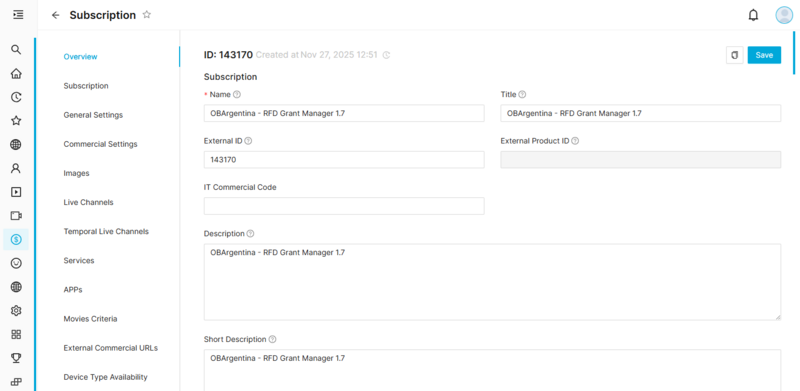
In the edit page you will be able to review all the element information as well as related blocks. You can easily navigate over the different blocks using the Quick Access menu.
Note: If you are not able to see the Quick Access Menu, zoom out your browser to adjust the screen resolution.
You can create a new entry or edit an existing one. When editing, some fields are read only and some of them are not.
There are several actions that can be done on the edit page.
 Create
To create a new entry, you will have to fill in all the mandatory data.
 Save
Save
Once you have finished modifying an element, you can use the ![]() button to apply changes.
button to apply changes.
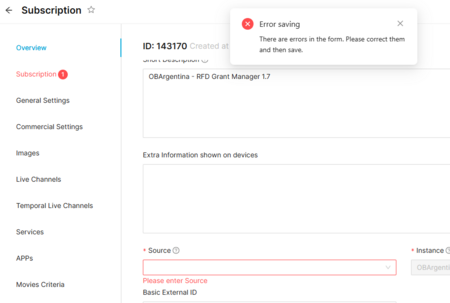
MIB will perform some validations before submitting the data, such as:
- Mandatory fields: all the required fields have to be filled in.
- Specific page validations: some pages might have specific validation rules. Example: a movie cannot be saved without medias.
- Specific block validations: some of the relateds blocks might have specific validation rules.
If any of these validations fail, an error will be displayed indicating the reason. You will be able to navigate over the different errors with the up&down arrows in the error notification.
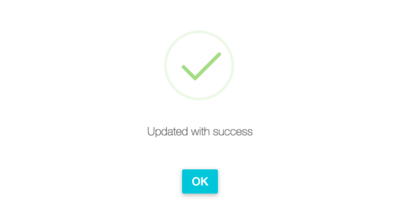
Otherwise, the modifications will be applied and the element will be saved. A confirmation message will be displayed after that.
 Delete
In some of the pages, it is possible to use the ![]() button to remove an element. MIB will ask you for confirmation before removing the item.
button to remove an element. MIB will ask you for confirmation before removing the item.
 Copy
Copy
The copy button ![]() will create a new entry copying all the basic fields, excluding the related blocks information.
will create a new entry copying all the basic fields, excluding the related blocks information.
 Copy with Relateds
The copy with relateds button ![]() will create a new entry copying all the basic fields and the related blocks.
will create a new entry copying all the basic fields and the related blocks.
For the related blocks, copy with relateds will behave differently depending on the type of block:
- Do not copy: the related block data will not be copied.
- Use same IDs (Shallow Copy): the related block data will be copied pointing to the same items than the copied one. It will just copy the relationship.
- Copy objects (Deep copy): the related block data will be copied pointing to the new items copied. It will clone the items that were linked to the source element and will link them to the new element.
Bulk Edit Page
This page allows you to edit several items at the same time. To do it, you just have to select those fields and block you want to be modified.
Modify a field
Once you select a field in Bulk Edit, you will be able to modify it. Take into account that those fields that cannot be Edit in normal Edit mode, it cannot be modified here also.


Modify a related block
1. Select the related block you want to modify for all the Bulk Edit elements.
Note: not all the blocks will be available in the Bulk Edit page because there are some modifications that are not safe.
2. After that, select the elements you want to be added/removed.
Then select what action you want to do from the drop down list:
- Add to existing: All the items you select in the block will be added to the existing ones.
- Find and remove these: All the items you select in the block will be removed if they exist in any of the bulk edit elements.
- Clear all: It will clear all the related block entries in all the bulk edit elements.
- Replace all with: It will clear all the related block entries and replace them by the ones that are selected in the block.
Apply changes
Once finished editing, press ![]() button and changes will be applied.
button and changes will be applied.
MIB 3.0 pages
 Instances
Notifications
Notification Interests
Notifications Queue
Feedback Result
Settings
Catalog Exporter
Exporter Monitoring
Catalog Exporter V2
Age Ratings
Age Rating Alternate Codes
Payment Methods
Devices by Payment Method
Instance Devices
Platforms
HTMLs
Links
Platforms PIN Default
Parameters
Menus
Parameters Partitions
Command Types
Massive Commands
 Users
Users
Groups
Sent Mail
User Devices
User Preferences
Users Profiles
Avatar Images
User Interests
 Video On Demand
Movies
Series
Movies Age Rating
Media Files
Subtitles
VOD Channels
Editorial Contents
Content Workflow
Metadata Validation Area
Metadata
Metadata Validation Rules
Metadata Validation Results
Importer
Importer Errors
Importer Schedules
ADI Mapping
DRM Mapping
Quality Mapping
Play Type Mapping
Device Type Mapping
Encoded Weight
Sources Quota
Preparation Area
Quality Area
Quarantine Area
CDN
Push Rules
Delivery Buckets
Origin x Push Rules
Origin
Storage Areas
Content Purge List
Sports
Competitions
Teams
Tournaments
EPG Sports
Sports Tournaments
Sports Teams
 Live
Live
Restart TV Channel
EPG
EPG Review
EPG Schedule Modifications
EPG Program Categories
EPG Roles
EPG Programs
EPG Age Ratings
EPG Schedule
EPG Program Types
Live Channels
CDN Lives
Media Services
Live Series
Live Seasons
Channel Maps
Regions
Postal Codes
Tv Technologies
Zones
Flexilinear
Catchup POD Settings
Blackouts
Mediaroom
Blackout Collections
Blackout Schedules
Blackout GRC Areas
TVOpen Blackouts
 Commercial
Event Collections
Subscription
External URLs - Deprecated
Commercial Offer
Pricing
Pricing Model
Pricing Products
Pricing Categories
Vouchers
Vouchers - Products
Purchases
Massive PayPerView Purchases
Micro Payments
SIA Purchases
Netflix Billing
External Cancellations
External Purchases
Products
Media Type Changes
Products Load
External Products
Partners
Netflix Promotions
Bundle Users
Bundle Packages
Netflix Bundle Plan Changes
Legacy Unique ID's
Services
Service Types
 Commons
Dictionaries
Dictionary Languages
Dictionary Editor
Images
Image Profiles
Image Profiles x Product Types
Languages
Device Types
Device Type Groups
Device Type Model
Genres
Persons Roles
Producers
Distributors
Countries
Persons
Content Category
Applications
UX References
Age Descriptors
 Administration
Components
GVP Jobs
GVP Jobs Configuration
GVP Agents
Access Control
Permissions Groups
Categories
MIB Users
Content Sources
Content Criteria
Audit
Content Workflow Tasks
DMM Control
Local Folders
Remote Folders
DMM Jobs
Encoding Profiles
Enumerations
Affected Services(Deprecated)
SCOM Notification (Deprecated)
Instance Notifications (Deprecated)
Event Collector (Deprecated)
Clients (Deprecated)
